INSTALLATION GUIDE
How to use AO3 skins
Learn how to create an AO3 Site Skin, paste custom CSS, and activate it on your account in four simple steps. No downloads or browser extensions required.
- STEP 01
Choose a skin and copy its CSS
Open a skin’s detail page and select Get skin CSS. In the panel that opens, select Copy all CSS or download the CSS file.
- STEP 02
Create a new Site Skin on AO3
Sign in to AO3 and open your Skins page from the dashboard. Make sure My Site Skins is selected, then choose Create Site Skin.
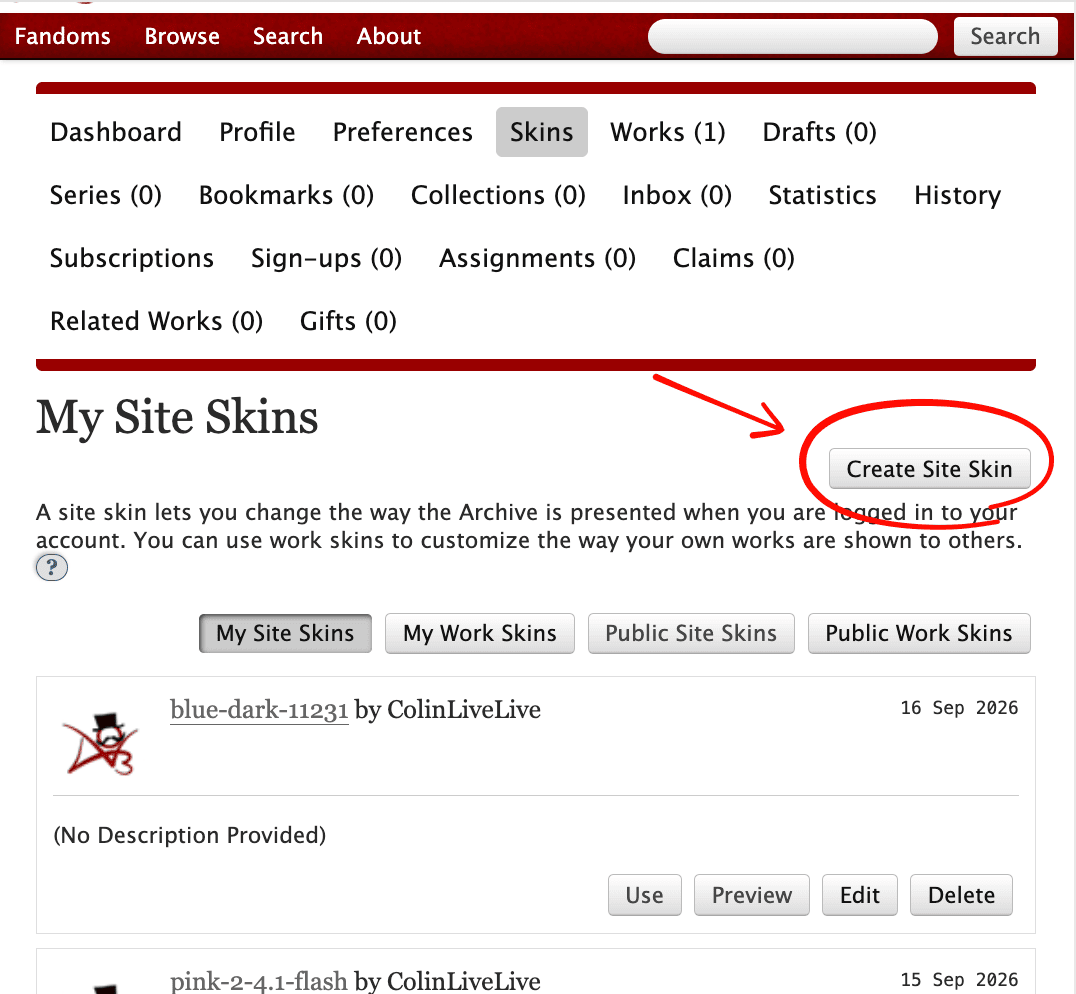
Open the Skins tab from your dashboard and select Create Site Skin. - STEP 03
Name the skin and paste the CSS
Leave Type set to Site Skin, enter any title you will recognize, and paste the copied code into the large CSS field. Description and preview image are optional.
Scroll to the bottom and select Submit.
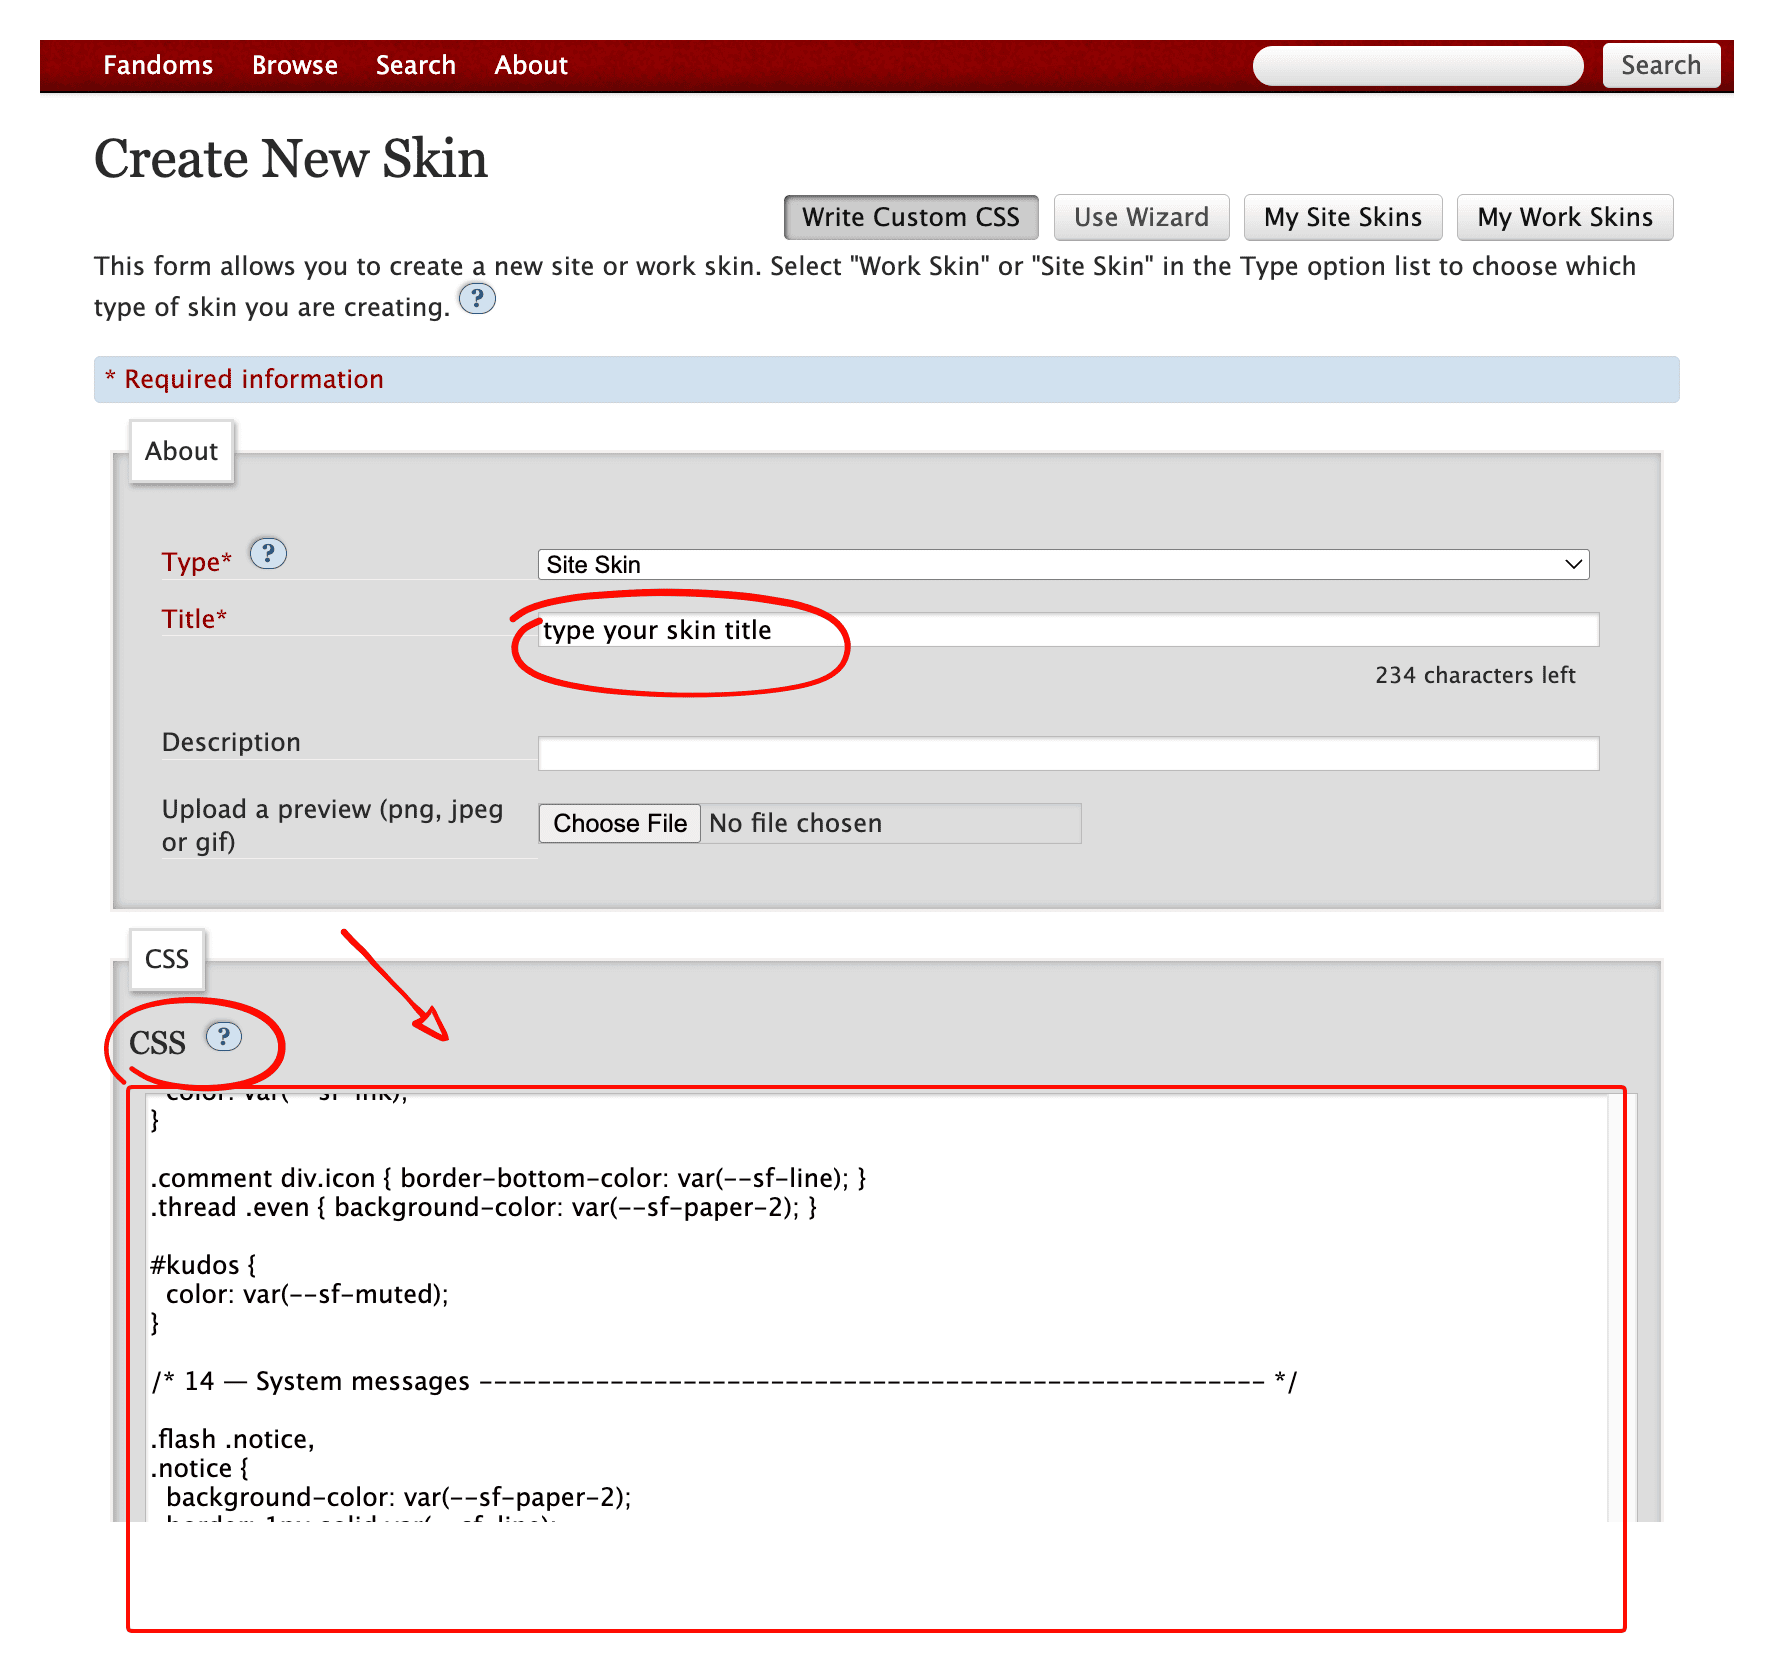
Add a title, paste the complete code into the CSS field, then submit the form. - STEP 04
Activate your new skin
After saving, return to My Site Skins and find the skin you just created. Select Use; AO3 will apply it to your account immediately. You can return here at any time to preview, edit, or switch skins.
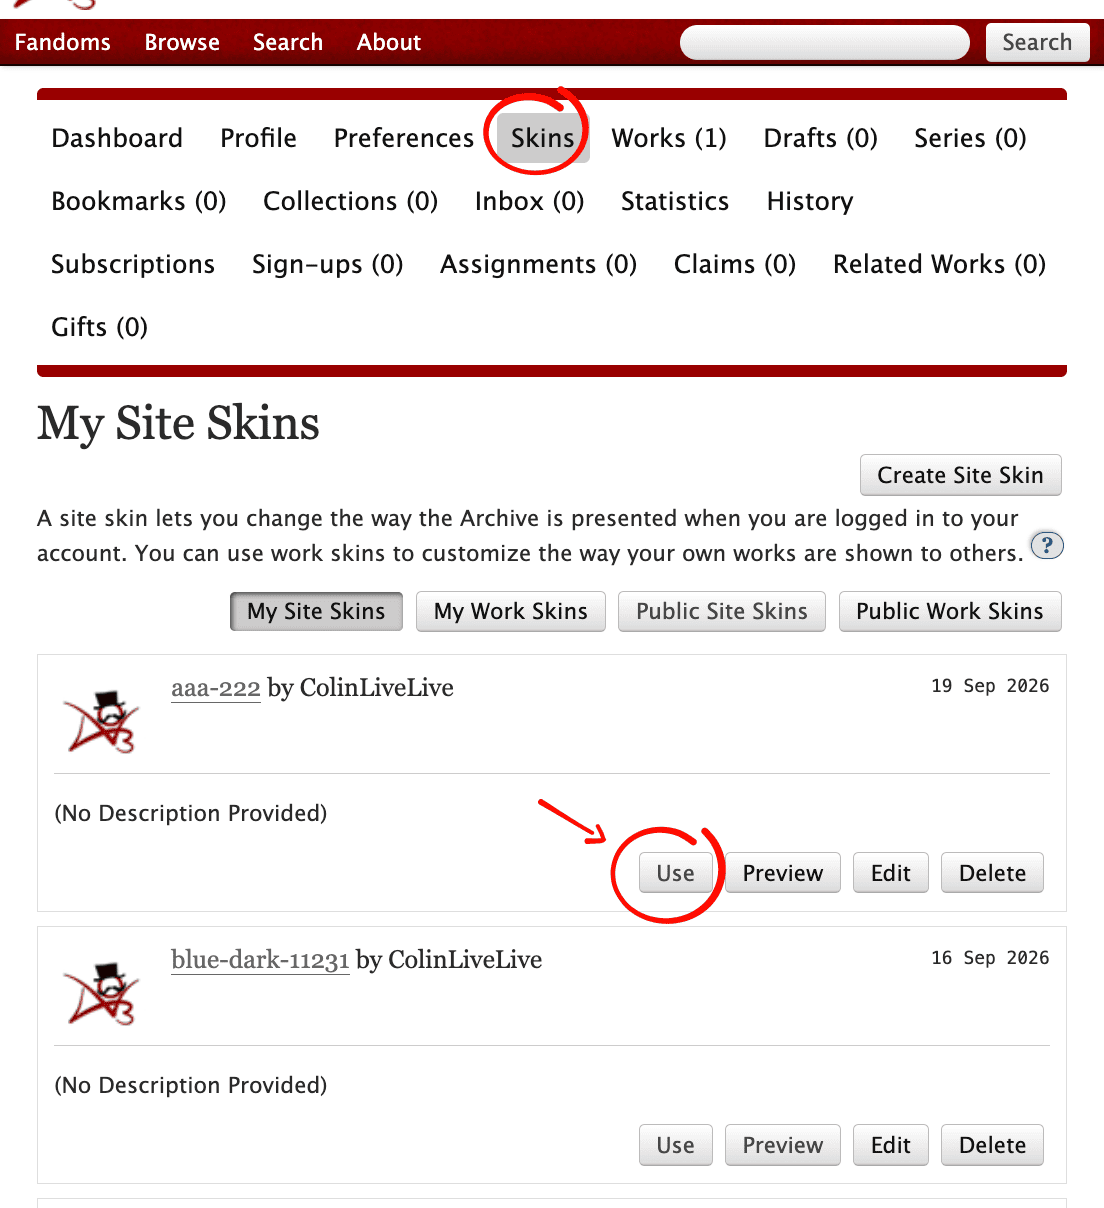
Find the saved skin in your list and select Use to activate it.